
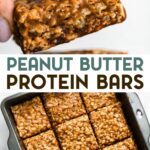
These Homemade No-Bake Peanut Butter Protein Bars are subtly sweet, both crispy and chewy in texture, and are packed with up to 14 grams of protein per bar!

I’ve made SO many batches of these bars lately to help my husband and I increase our protein between meals. They’re not only more delicious but also way more budget-friendly than buying $5 store-bought protein bars. Plus, they freeze beautifully!
I do my best to incorporate high-quality protein at every meal, with various gluten-free recipes like my Mediterranean pork tenderloin medallions, Instant Pot gumbo, and my orange shrimp stir fry recipe. However, I find I still need to incorporate a few snacks in order to meet my protein goals throughout the day. That said, my husband and I have different protein needs, and these homemade protein bars make it simple to customize!
Ingredients and Substitutions
Below is an overview of the ingredients and instructions for this no-bake peanut butter protein bar recipe. Please be sure to scroll down to the recipe card below for the complete details and nutrition information!

- Creamy Peanut Butter – If preferred, almond butter, cashew butter, or sunflower seed butter will also work. Just be sure to choose a smooth, drippy nut or seed butter without added sugar!
- Maple Syrup – Adjust the amount included depending on the protein powder and cereal used. If preferred, honey will also work!
- Dairy-Free Milk – I recommend using unsweetened almond milk or coconut milk for the best taste and texture.
- Vanilla Extract – This adds a delicious vanilla flavor and enhances the taste of the rest of the ingredients.
- Vegan Protein Powder – I recommend using chocolate or vanilla protein powder. But feel free to experiment!
Protein Powder Tip: Be sure to weigh the protein powder before adding it to the bars. Otherwise, the batter might be too thick depending on the type of protein used. Plant-based protein (such as pea protein) or egg white protein work best!
- Crispy Brown Rice Cereal – I love The Real Cereal Co. crispy brown rice cereal. OF course, you can use any gluten-free rice crispy cereal, but I recommend selecting one without added sugar to keep the overall sugar content lower. Make sure to look for cereal that is certified gluten-free! Or, substitute gluten-free rolled oats.
Note: The amount of rice cereal you need may vary based on the type of cereal and protein powder used.
- Optional Mix-Ins – If you want to add even more flavor and texture to this crispy peanut butter protein bars recipe or are looking for variations, feel free to experiment with mix-ins like dried cherries, dark chocolate chips, coconut flakes, or chopped nuts.
Protein Prep Tip
For a light snack or pre-workout boost, I cut them into small squares with about 7 grams of protein each. If you’re looking for something more filling, larger squares are perfect for an on-the-go breakfast or hearty snack, packing around 12–14 grams of protein depending on the type of protein powder you use.
How to Make Crispy Peanut Butter Protein Bars
Before you begin, line a square baking dish with parchment paper.
- Heat. Add the wet ingredients (except the vanilla) to a small saucepan. Then, warm the mixture over medium-low heat, whisking constantly until a smooth batter forms and begins to bubble. Do NOT let it come to a boil!


- Add the dry ingredients. Remove the pan from the heat, and stir in the vanilla, protein powder, and salt until smooth. Then, gradually add the cereal one cup at a time, stirring to combine and coat it with the nut butter. Make sure the batter isnt’ too sticky to transfer to the pan.
Pro-Tips: Start with 3 ¼ cups of rice cereal. Then, gradually add more as needed to achieve the right texture for the bars to set properly. You shouldn’t need more than 4 ½ cups!
- Shape. Transfer the batter to the prepared baking dish. Then, use a spatula to gently smooth out and press the batter down.


- Chill. Transfer the pan to the fridge for at least an hour or until the bars are set. Note- Keep in mind that the bars will firm up more as they chill in the fridge
- Serve. Slice the bars into 9 equal-sized squares, and enjoy!


More of Our Favorite
Gluten-Free High Protein Snacks
Common Questions
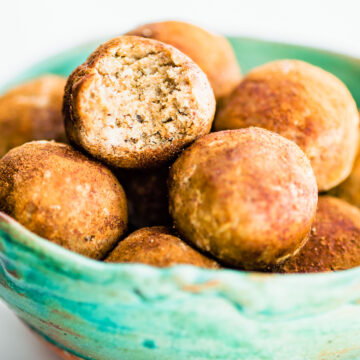
Yes! This recipe works great as protein balls. I recommend pressing the “batter” into a pan, and chilling. Then, cut it into small squares, and roll the squares into balls.
Leftover bars will stay fresh in an airtight container in the fridge for up to 7-10 days.
Yes! These bars will stay fresh in the freezer for up to 2 months. I recommend wrapping them individually in wax paper to prevent them from sticking together. Then, thaw in the fridge or at room temperature when you’re ready to eat.

No Bake Peanut Butter Protein Bars Recipe
- Total Time: 1 hour 10 minutes
- Yield: 9 bars 1x
- Diet: Gluten Free
Description
Skip the store-bought options, and make this crispy, chewy, no-bake, gluten-free peanut butter protein bars recipe with simple ingredients at home instead!
Ingredients
- ¾ cup (180 grams) smooth no stir creamy peanut butter (see notes)
- ⅔ cup maple syrup (if the peanut butter is thick, use closer to ¾ cup)
- ⅓ cup non-dairy milk (almond or coconut)
- 105 grams (¾ cup to 1 cup, depending on the powder’s density) chocolate or vanilla protein powder (see notes)
- 1 teaspoon vanilla extract
- Pinch sea salt
- 3 ½ to 4 ½ cups crispy brown rice cereal (see notes)
- Optional Mix Ins – dried cherries, dark chocolate, coconut flakes
Instructions
- Line an 8×8-inch baking dish with parchment paper.
- In a saucepan, heat the peanut butter, maple syrup, and milk over medium to medium low heat, whisking until smooth and the batter starts to almost bubble, about 1-2 minutes (don’t let it boil!).
- Remove the pan from the heat, stir in the protein powder, vanilla, and salt until smooth. Gradually add the cereal (1 cup at a time) mixing until evenly coated with the nut butter mixture. If your batter is too sticky to transfer into the pan, mix in an additional ¼ cup until the batter is thick enough to press into the pan.
- Transfer the batter to the lined baking dish, using a spatula to press the batter smoothly and evenly into the pan. Refrigerate the bars for 1 hour, or until the mixture is firm and fully set.
- Once chilled, cut the bars into 9 squares about 2.25 to 2.5 inches wide. Store the sliced bars in an airtight container in the fridge for up to 7 days or freeze the bars for up to 2 months by wrapping them in wax paper and storing in an airtight container or plastic bag.
Notes
Substitute Tips – Choose a smooth, drippy peanut butter or almond butter without added sugar. Almond butter works perfectly as a substitute. You can use any gluten-free rice crispy cereal, but I recommend selecting one without added sugar to keep the overall sugar content lower
Batter Consistency Tip – The amount of rice cereal you need may vary based on the type of cereal and protein powder used. Start with 3 ½ cups of rice cereal, and gradually add more as needed, up to 4 ½ cups, to achieve the right texture for the bars to set properly. For example, brown rice cereal tends to be heavier, so I only needed about 3 ¾ to 4 cups to reach the perfect consistency. Keep in mind that the bars will firm up more as they chill in the fridge
Protein Powder Tips – Be sure to weigh the protein powder before adding otherwise the batter might be too thick depending on the type of protein used. Plant based protein (such as pea protein) or egg white protein work best. Feel free to experiment with different protein flavors, like chocolate, or vanilla with a mix of cinnamon, etc.
- Prep Time: 10 min
- Chill Time: 1 hour
- Category: snack
- Method: no bake
- Cuisine: American
Nutrition
- Serving Size: 1 square bar
- Calories: 249
- Sugar: 13.5 g
- Sodium: 117.5 mg
- Fat: 10.8 g
- Saturated Fat: 0.8 g
- Carbohydrates: 26.7 g
- Fiber: 2.6 g
- Protein: 14.3 g
- Cholesterol: 0 mg


Hi! These look so good! What brand of protein powder did you use? I have never bought protein powder in my life, so would not know how to begin to figure out a good one!
Hey Gina! Do you want the bars to be more or less sweet? That’ll depend on the type of protein you use—an unsweetened version will keep them more neutral, while a vanilla-flavored one will add extra sweetness. You can also use peanut flour, which I’ve done before, for more of a peanut butter taste. Both work great, but personally, I prefer an unsweetened plant-based protein since it balances out better.
Also, will you be using this protein powder again after making the bars, or is this just a one-time thing? That way, I can help guide you on the best option!
Lindsay, I usually LOVE your recipes but this one is a one-and-done for me. Too sweet and too sticky.
Hey Diane! Did you get my message earlier? The updated version starts 1/2 cup maple syrup. That works great for me! I can send you pictures of what it looks like if needed. Also, did you use a sweet protein powder? That could also contribute to the sweetness. YOu could use a plain version instead. Hope you give them another try. 🙂
Lindsay, you are so nice to follow up with me. Please accept my apology for not replying to you sooner. This was my first try using a whey based flavored protein. No need to modify your recipe for me. I can play with it on my own. My husband is eating these bars with glee. Thank you for your wonderful recipes, and the work you do.
I would totally recommend these if you are looking for something sweet… but make sure to freeze them if you like crunch, like me. Made these yesterday. Ordered the same rice crispy cereal because I could not find a gluten-sugar free option in the store. I expected them to be crunchier after the hour in the fridge – more like rice crispy treats. Initially disappointed by the texture, but I really liked the flavor. So I followed your advice to freeze them, and that gave them just enough crunch for me. Half a bar was perfect with a cup of hot cinnamon tea on this super cold day. Thanks for another great recipe as I continue to build my gluten-dairy-processed sugar-free repetore of yumminess.
Thanks for the feedback Shannon! I’m glad you liked them. Yes, if don’t freeze them, they are more chewy with a little crispy texture. You could also try using less peanut butter for a crunchy texture. Maybe 2/3 cup. Either way, I love how adaptable this recipe is 🙌